
I’m not even going to share how the attempt at the embroidered patch went. But I’d like to take another shot at it so, assuming that goes better, will show both attempts. In the meantime, I thought sod this, and promptly ordered printed shoulder patches.
And do you know what? I’m really quite glad that I did! Luckily my graphic design skills are far superior to my embroidery skills (which still isn’t saying much, in honesty) and I was able to add a little more detail to the star that was going to be present in the embroidery.
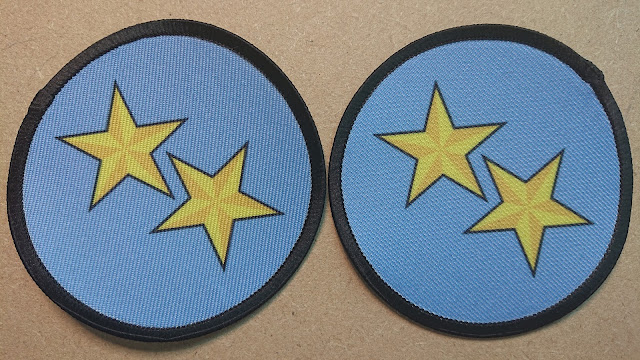
Using Affinity Designer, I updated the file that I had printed to use as a stencil for my own attempt. I was also able to take a little shortcut, as the software comes with included images to use. Very luckily for me they included this very star. I just went into the star document, made some alterations to the colours and made sure all the pieces aligned properly, ready for printing. I found a different seller on Etsy who offered custom patches and they came out great!
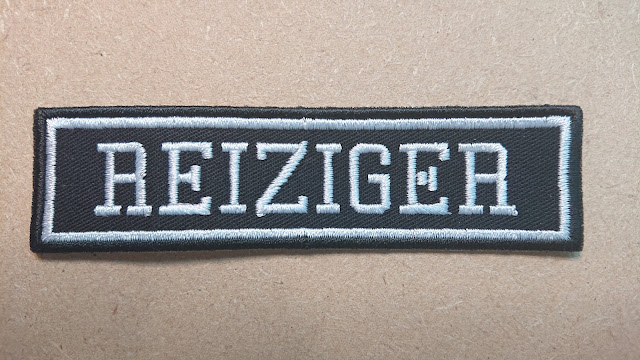
The name patch mentioned in Part One arrived, and with it the reveal of who this particular uniform will be for: Chief Superintendent Reiziger. With these videos, I don’t think I could convincingly play a woman in her early 20’s (30’s maybe…I was mistaken for a woman once after all, when I had long hair..) so instead this uniform goes to her dad. I had originally asked for a completely black border when I placed the order. Other customers had posted images of it, and I had been messaging the seller and it was all OK’d. I even included the request in the description, which the seller had also asked me to do. And then got a white border. But it looks great, so I don’t mind. I had gone back and forth to begin with, so potato, potahto (but who says potahto?)
I’d really like to make a Scheme Officer Lucas Karaner shirt as well. Along with the obvious name tag change, the shoulder patches will be in a different colour, and he’ll have no pips on his epaulettes.
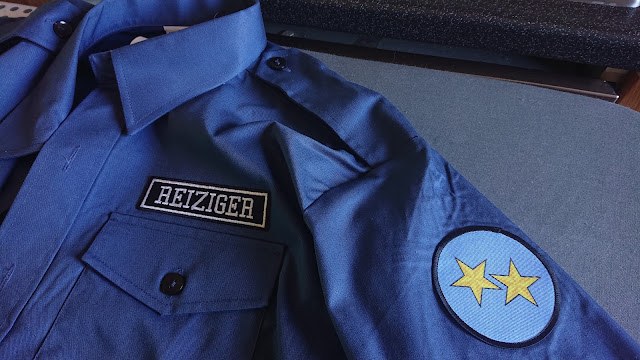
And so to the application! I gave the shirt a little iron to flatten out the surfaces and went to work. Both the name and shoulder patches are iron-on so it wasn’t too difficult to position them and get them attached. Though the name patch did have a strip that needed to be removed first, to uncover the glue…I’m sure glad I noticed that right away and didn’t try to iron it first… But I’ll be adding black stitching around the edges to secure them properly. This is more needed on the shoulders (I’ve done one already), as the glue doesn’t reach behind the black border.
So now we’re almost there! Nearly done! All I need to do now is make the epaulette and pips, which I’ll cover in the next part.
Thanks for reading,
Chris

Leave a comment